Recording audio from external devices (Cassette Players, VCRs, and More)
If you're looking to digitize your old cassette tapes, DVDs, or any other external music sources into computer audio files, NowSmart Audio Recorder is the ideal software for you. It allows you to effortlessly convert your collection into digital formats quickly and easily.
Step 1: Connect the External Device to Your Computer
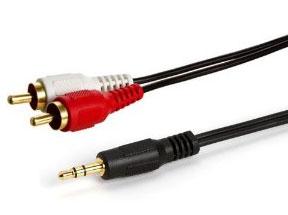
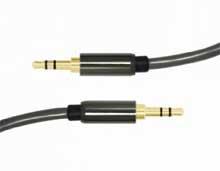
You'll need to link your player's output to your computer's Line In jack. The cable required depends on your player's output jack. Common options include an RCA to 3.5mm stereo cable or a 3.5mm to 3.5mm stereo cable. Here are some examples:
For RCA to 3.5mm: https://www.amazon.com/SF-Cable-3-5mm-Stereo-Splitter/dp/B0016LFN2C
For 3.5mm to 3.5mm: https://www.amazon.com/Mediabridge-3-5mm-Stereo-Audio-Cable/dp/B004LU1U2M
note: these are for reference only and not specific recommendations
There are several other output jack types, such as 6.35mm stereo and XLR. Choose the cable that matches the output jack of your device.
Once you have the right cable, you can connect the left and right Audio Out or the headphone jack from your external audio or video device to the Line In jack (usually colored blue) on your sound card.

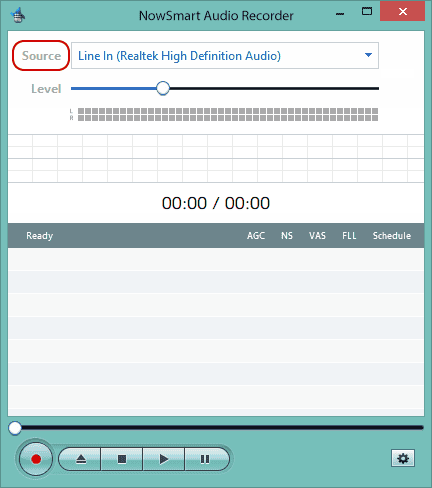
Step 2: Select the Correct Audio Source.
If your device is connected to the primary sound card, such as Realtek High Definition Audio, choose Line In from the corresponding section.
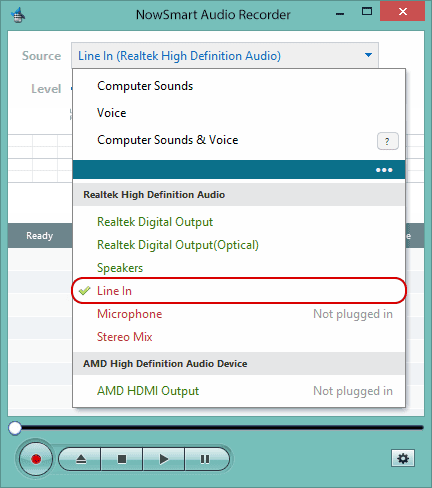
Device names vary by manufacturer, so look out for labels like Line In, Line Input, or Linein.
Step 3: Name Your Audio File (Optional).
Click the Add/New button to select an audio file or to name a new one, like test.mp3, test.wav, or test.flac.

NowSmart Audio Recorder will save the recorded sounds directly to this file. You can play back the recorded audio with any media player software on your computer.
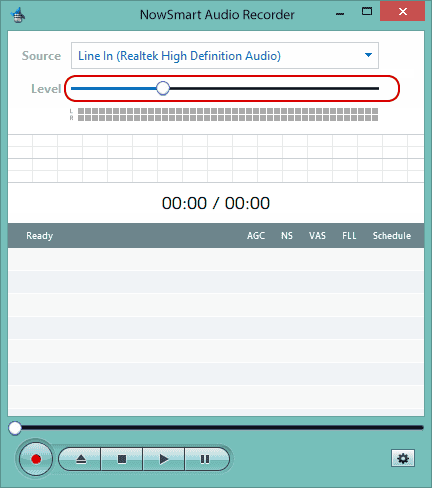
Step 4: Begin Recording
Press the Record button to start.

Adjust the recording volume as needed.
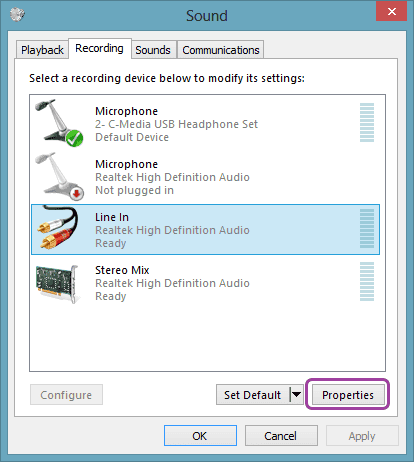
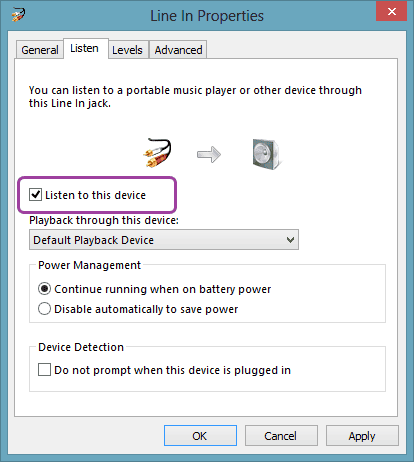
Step 5: Enable Playback Through Speakers While Recording (Optional)
To hear the audio as it records, open the Control Panel by clicking Source
Select Line In, then Properties.
Under the Listen tab, enable Listen to this device.
This method can also apply to recording from various external devices, such as keyboards, TVs, radios, and more, allowing you to preserve and enjoy your audio collection in a modern format.